27 May 2011

When it would be crazy not to

I don’t know if it is appropriate to be talking about apple pie as we are rapidly approaching the junction of May and June, the time when apples and pies and apples in pies seem so irrelevant, so unrelated to what is happening right now as we talk: fresh local juicy stubbly deep-red strawberries galore, soon to be followed by the myriad of other berries, so long-awaited, so bright. All right, it is crazy to just think about apple pie at this point of year. Insane, even.


Yet, I made Russian apple pie twice past week, strawberries notwithstanding. I don’t know how to classify it.


I was randomly re-reading parts of A Year of Russian Feasts, by Catherine Cheremeteff Jones, and a chapter on Russian tea ceremony accompanied by a recipe for a yeast dough apple pie (a.k.a. apple pie, Russian style) got me to recall my maternal grandmother’s delicious apple pie that she would make for me as I was staying with her in our river-bank country house for a week at the beginning of each summer as I was a kid, years and years ago. But however tasty the pie was, I also recalled I wasn’t looking forward to it.


I guess for many a kid, to stay in the country side with their beloved grandmother would be nothing less than fun. Not for me, though. I was terrified of it.

My maternal grandmother, Aglaya, is a high blood pressure patient. Every day of the week I had to spend with her in the distant picturesque summer country side was marred by my fearing that she would suddenly expire from a heart attack – please, no! -- in the middle of the night, and I would be left in the scary nocturnal darkness not knowing what I would have to be doing to get help for her, for myself, or whatever (that wasn’t yet an era of mobile telecommunication). Oh, doesn’t it sound dramatic! But hey, I was a sensitive kid, and I guess you can say troubled too!

The first two or three days of that bonding week, as my mother usually thought it be, would almost always go easy, to my relief. My grandmother and I would prune and water the vegetable patches in our garden, go swimming in the river, pay visits to the remote neighbors or the unwatched gardens close by, drink tea with store-bought sweets, watch black and white TV, and play cards. But then on the fourth day – mysteriously, it would always happen on a Thursday -- my grandmother would wake up to a bad headache, high blood pressure starting building up. As the day progressed, the symptoms wouldn’t budge, even despite the large medicine in-take. By midnight, my grandmother wouldn’t stop her I’m dying-s. I felt morbid. (I’m sorry, but at the age of seven, eight, nine and ten I took those proclamations very, very, very literally.) There was one thing, the last frontier, believed to be able to help:
vinegar (a lot of which would be poured onto a small towel that would be applied to feet). I was eager to go and bring a bottle of it from our kitchen downstairs. To get down to the kitchen meant I had to take the outdoor stairs and then go around a corner of the house to reach the arched heavy kitchen door. At night with nature making weird unnatural sounds, a trek of a mere couple dozen steps felt like going down into a deep dungeon. I was ready to do it for my grandmother. I was happy I could help. Often vinegar did the trick lessening the blood pressure. Eventually my grandmother would fall asleep. I would regularly come out from my room to see if she was breathing.

The next day my grandmother would be on her feet again, preparing for my parents’ visit over the weekend. For me, it meant nothing else but joy: I would be going home soon. But besides the approaching weekend and the nearing this-year-I-don’t-have-to-do-it-anymore delirium, there was another thing for me to get pretty darn excited about: apple pie.

My grandmother has a thing with yeast dough. She is a yeast dough whisperer. If I remember rightly, never did I see a scale or at least one measuring cup in her vicinity when she would start the dough. All measurements were intuitive and always (!) worked. Of course, my childhood memories may not be crystal clear by now, but seriously! To see the dough risen and eager to crawl out from under the lid of a dented white pot was kind of arcane – and fun. My favorite part was to punch the dough down imagining I was a ghost buster at task of taming a cute monster. The sour-ish yeasty wisps emanating from it were full of promise of something good and safe and warm and lovely.

While the monster/dough was resting/rising, I’d get busy picking apples (an early summer sort) fallen from our apple tree and now lying idly on the shadowy ground. My grandmother would use them, cooked with sugar until just soft, for the filling. It was a simple apple pie. And it was tasty. Sweet apples, slightly tart at the heart, encased and relaxed between and into the two layers of the fragrant, a touch buttery, dough. Made with gusto, it was also a sign that my grandmother was doing ok again, and that she is a fighter.

I wanted to share my grandmother’s apple pie recipe with you today. I called her to ask for guidance. But she is an intuitive baker, and so it transpired she doesn’t need nor does she have the recipe. It’s why I resort to the one from A Year of Russian Feasts. Having made it twice by now, I’m happy to say the resulting pie is as good as the specimen from years gone, except that no drama and only dry active yeast is required.

All you need to do is to mix dry yeast with melted butter and a mix of lukewarm milk and water, add sugar, salt and flour, and knead it until the dough comes together and forms a ball. You then let it rest until it doubles in size, about an hour, give or take. Meanwhile, you cook tart baking-friendly apples with light brown sugar, for a deeper flavor, until they have released their juices. We tend to think that apples and cinnamon is a match, but try apples with fresh vanilla seeds. With them, an apple taste like its quintessential self. Should I be a Granny Smith in my next life, I’d spend it with vanilla seeds, I decided. Anyway, when the dough has puffed up and looks ready, form it into a ball and cut in half. Roll out the first half, place in a pie pan and send in the apples. Roll out the second half, slightly larger than the first, and cover the fruit. Pinch the dough edges together, brush the top with egg wash and bake until the pie is golden.

The pie is down-to-earth, and even basic, yet there is some simple magic going on in there, the moist fruit has bonded together with the dough, vanilla and yeasty aromas merged into one. And the butter, it’s quietly letting you know it’s there but that it’s not going to steal the show. As Cheremeteff Jones describes the pie: “a wonderfully delicate “apple sandwich”. Try it for yourself. If it seems – and it does! – insane to compel strawberries and the likes to wait, bookmark the recipe for the colder months then, when it would be crazy not to make it.

Russian-style apple pie
Adapted from A Year of Russian Feasts by Catherine Cheremeteff Jones
Yield: Serves 6-8

For the apple filling:
900 gr (2 pounds [about 5 large or 6 medium]), tart baking apples, such as Granny Smith, peeled, quartered, cored, and diced in big chunks
120 gr (4 oz) light brown sugar
seeds of one vanilla bean


Combine the apples, sugar and vanilla seeds in a large saucepan, and cook over medium heat, stirring occasionally, until the apples are soft and the apple juices have evaporated, about 10-15 mins. (Drain if the apples are soft but the liquid is still there.) Remove from the fire and let cool. (The filling can be made up to three days in advance; keep covered and refrigerated).

For the yeast dough:
8 gr (0.4 oz) active dry yeast
60 ml (1/4 cup) whole milk
60 ml (1/4 cup) water
30 gr (1 oz) sugar
1 large egg, beaten
120 gr (1 stick) unsalted butter, melted and still warm
310 gr unbleached all-purpose flour, plus more as needed
Egg wash (one more egg, beaten)
Light brown sugar for sprinkling, optional

1. Put the yeast in a large mixing bowl.


2. Heat the milk together with water until lukewarm. Add the milk mixture to the yeast and stir until the yeast has been dissolved. Add the sugar, salt, egg and butter (still warm!) and mix well until combined. Add half of the flour and using a mixer with the dough hook attachment work on low speed until combined. Add the remaining flour and mix until incorporated. Up the speed to medium and continue mixing for the next 4-5 minutes (scrape down the sides of the bowl after 2-minute mark), or until the dough is no longer sticky and forms a ball. If the dough remains sticky after 3 minutes of mixing, add more flour, 1 tablespoon (15 gr) at a time, until the dough comes together (the amount of extra flour needed can be between 1 to 3 tablespoons). Cover the bowl with plastic film and let the dough rise in a warm place for about 1 hour, or until doubled in size.


3. Pre-heat the oven to 175 C (350 F) and butter a 22- or 24-cm (9- or 9 ½-inch) pie plate.

4. Lightly flour a work surface. Take the dough and shape it into a ball. Cut the ball in two equal parts. With a rolling pin, roll out one part of the dough into a circle wide enough to fit into the prepared pie plate (if needed, continue to lightly flour the work surface and the dough to prevent sticking). Transfer the dough gently into the pie plate, and using your fingers, create an even 1-cm (1/2 inch) overhang. Place the apple filling evenly over the dough.

5. Flour the work surface again and roll out the second part of the dough into a circle slightly smaller in width than the first one. Carefully place it on top of the filling. Pinch and twist the edges of the dough together to seal them. Make sure to seal the wedges well, otherwise the top will disconnect while baking. Prick the top, cover with a clean dish towel, and let rise for 10 mins. Brush the top lightly with the egg wash. Sprinkle some light brown sugar (about 1 Tbsp or more), if using.

6. Bake for 30 mins, or until the top is golden brown. Let cool before unmolding. Wrapped up in plastic, the pie will keep at room temperature for up to three days.



6 May 2011

Can't help it


Minutes before sitting down and writing this story, it dawned on me that there is one thing I talk about time and again on this blog (and pretty much everywhere else, which makes me feel for those doomed to converse with me). The recurrent theme is: potatoes, a stamp in my Russian culinary ID. Did I tell you that potatoes are no secondary thing for a Russian? Did I tell you that yet? I’m sorry, can’t help it. So here goes again.

It is my grandparents’ custom to buy large quantities of potatoes in mid-fall (before their price would jump up later on) for the family to feed off in winter months. It all begins with multiple visits to local farmers’ markets to first select samples to test taste. A good spud has to meet the following criteria: it should not darken while cooking, and once boiled, it shouldn’t turn rubbery, but it can’t crumble too much under the pressure of a fork either, and most importantly, it has to taste creamy without any assistance of butter or dairy. Once a specimen capable of accomplishing the mission is found, my grandparents would load their white nearly thirty-years-old Soviet four-wheeler with sack after sack of un-scrubbed jacketed tubers.

Every other week for the next four or five months my grandfather would go to his garage basement to pick over the potato lot, or rather what gets left after the family starts to pack it away, for sprouts. Now there being fewer heads to feed – my uncle’s whole family of three moved to Moscow; I’m living abroad – and a new, less sturdier, almost flimsy car to load, the annual potato purchase grew smaller in size, but its importance is, and always will be, high. The household in winter is not complete if there are not enough potatoes in that dark garage basement.

We had the spuds simply boiled, pan-fried with onions, roasted with chicken; stewed with tomatoes and river fish; as a main or a side; for breakfast, lunch, and/or dinner; left over from a yesterday’s meal and freshly cooked. If I got sick and developed a bad cough, I didn’t have a chance to get away from having to stand over a pot with just cooked tubers and inhale the coming-out steam, my head covered with a towel to prevent the heat from escaping. The potato is believed to have particles with anti-inflammatory qualities and the steam to bear them in transit, was what my mother told me.

So I’ve had it a lot with potatoes, except that I didn’t have them cooked with sherry. Entirely by the way, I didn't have anything cooked with sherry. For one: there was no sherry around me in my formative years. The first libation "from the West" made its way to new Russia in early nineties and, if my memory serves me right, it was called brandy liquor. It came in dark-glass stubby bottles with a sail ship on the blue-sea label. I was uninterested to taste it then (and I'm not sure I would be now). My parents say it would never fail to give them a terrible headache, the best of possible bodily reactions to the drink.

Second of all, I think sherry falls into that category of fine drinks that one grows to appreciate with age. Also, I had to be old enough to stop believing that a sweet alcoholic substance such as the one in question should be reserved for an after-meal glass and not a pan of potatoes. But then again, it’s not your plain Jane pan of potatoes. In it, artichokes make an appearance as well. And the potatoes are those small springtime tubers that turn eminently fragrant in salted boiling water and whose thin skin crackles just so under your teeth giving way to the young creamy flesh underneath it.

The idea comes from the MORO East cookbook, a beautiful compilation of Eastern Mediterranean recipes by the owners of the acclaimed MORO restaurant in London, Sam and Sam Clark. Originally, the sampling in question goes by the name “artichokes and potatoes with oloroso sherry”. But I think the artichokes, though no lesser important to the accumulative taste of the ensemble, should, instead, come second in the title, for in my view the potatoes are the name of the game here. Hence what follows is "potatoes and artichokes with oloroso", the change is minor but imperative.

The actual substitute in the original is my use of marinated artichoke hearts in place of fresh ones, for which there are two reasons. One, artichokes in the Netherlands is not a local thistle. Which means I have to be prepared to live with a new dent in my wallet for months at hand if I wish to enjoy them fresh, imported, as is usually the case, from Italy. I don’t want to go down that road again. Two, I discovered that the sourness of the marinated artichokes is a perfect foil to the sweetness that comes with sherry. An additional bonus: a shorter cooking time.

You start by browning some onions. Once those are halfway to their color destination, you add the marinated artichokes, and let the duo cook together until the onions are golden and the artichokes develop a mild blush. Next goes a tiny bit of garlic, followed after a minute by sherry and water and fresh basil (MORO East uses mint, but I find basil mingles more successfully with the rest of the given ingredients). Finally, you nudge the cooked potatoes in the skillet, cover with a lid and let it all bubble for a while allowing the heat to leverage the unity between the subtle vegetables and the intense oloroso sherry. A few squirts of olive oil and more fresh basil at the end and you are ready for a delicious cheer on a plate. The caramelized onions and soft artichokes intermingle and soak up all that deep caramel flavor of the sherry, winding up to be sweet and sour all at once, making perfect companions for the mellowed plump spuds that got infused with the basil’s peppery herbal notes and nutty sherry, that same sherry. Oh, potatoes can get so lucky!

Potatoes and Artichokes with Oloroso Sherry

Adapted from MORO East, by Samantha and Samuel Clark
Serves 2 as a main or 4 as a side dish

This dish is an "all-year-rounder", considering you use the marinated artichokes. When new harvest tubers go off season, normal potatoes would be a bet just as good.

A word on sherry: while S. and S. Clark suggest medium oloroso sherry (“oloroso” means scented in Spanish) for this dish, I had delicious results with a dry oloroso variety as well. The bottom line is that regardless of what oloroso you get to use – it varies in types from dry to sweet – it should be good enough to be sipped on its own, as goes with any alcohol in cooking, you know.

500 gr (16.5 oz) new potatoes, scrubbed
4 good-quality (canned) marinated artichoke hearts, quartered
5 Tbsp olive oil
1 medium onion, thinly sliced
1 large garlic clove, thinly sliced
150 ml (1/2 cup plus 2 Tbsp) oloroso sherry
100 ml (1/3 cup plus 1 Tbsp) water
2 Tbsp roughly chopped fresh basil

1. Boil the potatoes in slightly salted water until tender; drain. When they are cool enough to handle, peel them and cut the large ones in half or in quarter.

2. Over medium fire, heat 3 Tbsp olive oil in a large skillet. When the oil is hot, stir in the onion and a pinch of salt, cut the heat back to medium-low and fry for 5-7 minutes, or until the onion is soft and starting to color.

3. Add the artichokes, and stirring occasionally, fry for another 3-5 minutes, or until the onion is golden and the artichokes take on golden hue.

4. Add the garlic and cook for 1 minute more. Pour in the sherry and water; add half the basil. Place the potatoes on top and sauté, uncovered, for the next 2-3 minutes. Stir, cover with a lid and continue cooking for another 4-5 minutes more.

5. Squirt with the remaining 2 Tbsp olive oil and sprinkle on with the rest of the basil. Serve warm or at room temperature.


23 April 2011

They are good


It wasn’t that long ago that the egg, a symbol of the Resurrection and such, was devilishly criticized. The line of argument was: the egg is so full of cholesterol, so full of rubbish. Just eat it and away you’ll pass, or something like that. Did the early Christians think about how unhealthy the egg is before adapting it as a token of Easter, prompting the billions of Easter-celebrating souls of every past and place into the egg blowout? Such idiots, those first Christians!


As a person who is very capable of going on the egg binge at and around festive Easter table – would you be that strong to not be tempted by an egg with stars brush-stroked all over it , sitting in the company of its brethren in an ornamental bowl seen from every corner of your studio apartment, the egg that’s eager to be cracked open, cleared from that prettied-up shell, dipped, starting from the top, into a mix of sea salt and freshly ground black pepper, and bitten into its glossy white and plump jiggly yolk? -- I’m chuffed to know that eggs will not quite kill me. Research shows that eggs are not as bad as they were thought to be. They are good. They are nutrient-rich. They are just angelic.


Egg whites are angelic, that is. Egg yolks be damned!


It’s not my intention to talk about the white-yolk split. Probably food scientists are right, and we should head their warnings and advice. Or maybe food scientists are misguided, and instead it’s best to listen to our bodies that know by default what we need and what we don’t. Personally, I’m for the golden-mean-approach to life in general and food in particular, except once-a-year celebrations such as Easter, Christmas, and my birthday, the bright days that, in my humble opinion, are meant to be observed by treating myself generously to foods I like, considering the season. (The list of those is extensive and thus shall go unreported on in this post.)


Anyway, it’s Easter, “air time” for whole good happy-chicken eggs and the usual Easter activities: the egg-decorating, the egg-hunting (optional), the egg-giving, and the egg-eating. This year I decided that I should somewhat diversify the latter and make something sweet with the egg at center stage. I figured out I should make meringues (egg whites – here we go!), known as early as in the seventeenth century under the names “Pets” or “white bisket bread”.


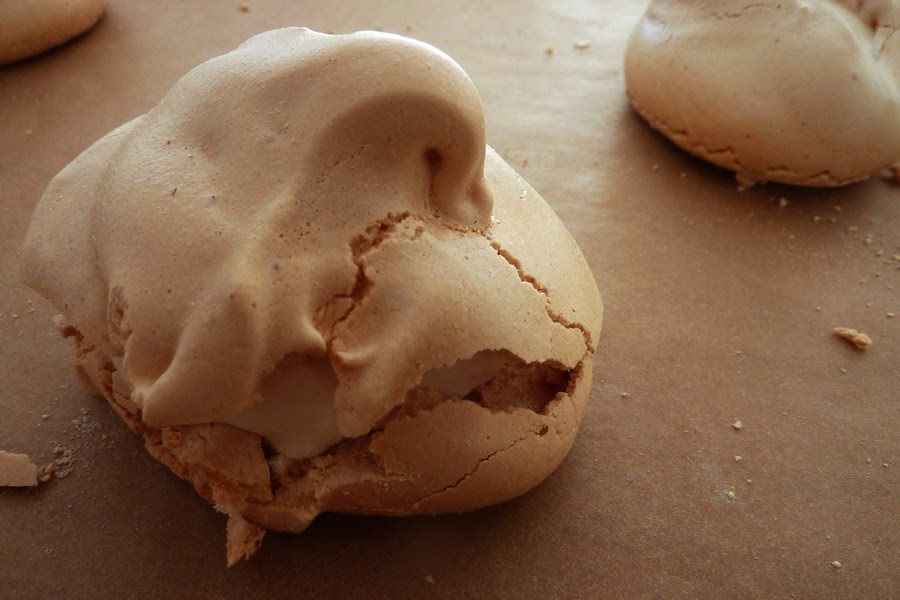
The other day I made this coffee cream. It was so ethereal and light (that is, as light as cream goes). And it knocked me off my feet and blew my mind away. I was supposed to use the coffee cream for an eponymous cake, but I couldn’t help sending spoonful by spoonful of it in my mouth from where it sneaked into my heart and is there to stay. And so the idea for meringues filled with coffee cream for Easter was sketched and off I went to try it out. After a fair amount of experimentation and testing, what emerged were pale beige, delicate, brittle, crunchy, with-a-slight-chew meringues filled with elegant fluffy coffee whipped cream. Eaten over a sink with one hand capped below your mouth to catch the crumbs, or on a plate with a fork to be good-mannered, it’s one word: delicious!


Meringue! What an untraditional thing to serve at Easter!, I hear my grandmothers say. It is a revered tradition in Russia to make kulich, cylindrical dome-shaped sweet yeasty bread, a symbol of Orthodox Easter.


As a kid, I would always stop by one of my grandmothers’ to watch her making kulich two or three days before the festive celebrations. I was fascinated by the mystery behind it. You can’t be in a bad mood to make it, and if you are, be prepared to see kulich dense and flat as a pancake when out from the oven. You can’t talk loudly next to where ­kulich is resting before baking, otherwise it will not rise. And once ­kulich is baked, you should place it, still in a tin, on a billowy pillow and cover with a clean ironed cotton sheet to let the holy bread cool off before unmolding it. So much revere, so much wonder! Only grandmothers can make kulich, I thought. They know so much, they are kind and patient and caring, and they like to speak in low voice.


I respect the traditions. I admire them. But I also want to learn the new and unorthodox for me, to find what speaks to me, to see where, in the end, I can and want to belong – and if I should avoid eating egg yolks.


Happy Easter, Happy Passover, Reader!


Coffee Cream Meringues

To me, these are so good just on its own.

For the meringues:
Adapted from Baking Illustrated
4 egg whites, at room temperature
185 gr (6.5 oz) granulated sugar
3 gr (0.1 oz) lemon juice


1. Pre-heat the oven to 100 C (212 F) and line a baking sheet with parchment paper. (Note: meringues baked at the given temperature will take on pale silky beige and that's fine; it matches well the subtle white-beige color of the coffee cream.)


2. In a clean bowl, combine the egg whites with the lemon juice and beat at medium-low until foamy, about 30 seconds. Increase the speed to medium-high and beat until the egg whites are white, voluminous and, as Baking Illustrated aptly describes, the consistency of shaving cream, about 90 seconds. In a gentle stream, add half of the sugar and beat, at high speed, until stiff peaks form, about 2-3 minutes.


3. Dial the speed down to the lowest, sprinkle in the other half of the sugar. Mix just until incorporated.


4. Using a dry soupspoon, immediately place nine heaping dollops of meringue, spacing them evenly, on the prepared baking sheet.


5. Bake for 1.5 hours or until the meringues look smooth, firm, dry, and shiny from the outside. Do not open the oven while baking; it will lead to the loss of heat and cause meringues to sink. Switch the oven off and leave the meringues in for another couple of hours to completely cool down.


6. Placed (once cool!) in an airtight container, the meringues will keep for up to two weeks, until ready to use.


For the coffee cream:
(inspired by Pierre Hermé via Dorie Greenspan)
200 gr (7 oz ) chilled heavy cream
10 gr (0.3 oz) granulated sugar
15 gr (0.5 oz) very strong freshly brewed coffee, cooled off


1. Stir the sugar and the coffee in the cream and beat until stiff peaks form. Do not overbeat, otherwise the cream will split.


2. Keep refrigerated and use within the next 24 hours. Before using, give it a gentle stir.


To assemble:


1. With a sharp serrated knife, cut each meringue in half lengthwise. Seeing how brittle meringues are, it is probably the trickiest part of the whole business. Here is how you do it: supporting a meringue shell in one hand without applying any force or pressure, start slowly cutting into it until its hollow top gives, usually a few moves with a knife are enough. Carefully remove the top (it’s ok if it shatters slightly, it’s easy to patch the bits together; the cream will hold the pieces just right), fill the bottom with a spoonful of the coffee cream (use a desert spoon), and place the top back. Repeat with the remaining meringues. Once assembled, the meringues should be served within the next 10-15 mins to prevent them from becoming soggy and soft.

9 April 2011

This is my plan

I’ve been wondering a lot why I’ve been tight on money these days. Would it be the purchase of a silk bed linen set or a designer coat that quadrupled my life costs recently? Surely it can’t be that, are you kidding me? It must be an emergent visit to a dentist and a planned consultation with an immigration lawyer last month that dehydrated this spender’s purse. It’s saddening for me to see my porte-monnaie cash-deprived. I’m wishing my wallet a speedy recovery.

Before that occurs, I’m going to cold-heartedly scrutinize my expenses. They are reckless, I find. Reckless because how else can one call the purchase of an unneeded, but not unwanted, kilo of 65% Valrhona chocolate for 13 euro (about 16 US dollars)? Half-witted expenses, trying to befriend high-price tags, getting so wrapped up in the extraneous.

It’s time I intervene.

Since food shopping is by far the most frequent one I do, I’ll eye where my cash goes at the market. This is my plan. We all know about the money-saving properties of legumes (peas, lentils, beans), these cheap standard-bearers of fine nutrition (fibre! antioxidants! folate! iron!), also known as “the poor man’s meat”? Indeed! So I’ve decided that for now there is no better chum for my buck than a good old legume!

If you commit any pieces that appear here to memory, you might remember my unconditional appreciation of the legume chickpea. That hasn’t changed, I swear. But it dawned on me lately that to be largely eating chickpeas is very much like wearing the same pair of beloved shoes every day while your shoe rack overflows with no lesser likeable footwear. Boring. Hence no chickpeas now.


The legume of my latter days is lens culinaris -- the lentil. No particular plan behind the choice. I simply came across the recipe for the Lebanese garlicky lentil salad in an old issue of Saveur; liked its effortlessness; and being amused by the amount of garlic called for -- twelve cloves! -- gave it a try. I only had to: 1) boil up some lentils; 2), sauté the garlic and, along with cumin, lemon juice and some fresh herb, add it to the cooked legumes. Wonder if twelve garlic cloves is a big lot? Yes, it is monstrous. But if the quantity of garlic is halved, the dish is just right: full-bodied earthy lentil matter filliped by tongue-tickling garlic and lemon and quietly supported by assertive cumin. Fresh parsley on top (Saveur suggests parsley and mint). No frills. All is clear and basic. Good for the body as well as for the wallet.

Reportedly, there is a tradition in Italy to eat lentils on New Year’s Eve as a token for a bigger income in the year to come, what with the lentils’ coin-reminiscent shape. I’m going to stick to the practice even though I’m not Italian and it’s currently nowhere near New Year’s Eve.


Salata Adas (Lebanese Garlicky Lentil Salad)

Adapted from Saveur, number 132, October 2010

Serves 2 as a main course, or 4 as a side, or 6 if used in wraps

I realize the salad is called garlicky for a reason, but I would also like to remember there are lentils in it too, which is not easy because of those twelve garlic cloves. The amount of lentils unchanged, the quantities of the rest of the components were adjusted to my liking. For example, I cut down on the olive oil too: I like my lentil/bean salads to be pleasantly moisturized by -- not swim in -- oil. Anyhow, feel free to play with the measurements: a dish that simple is good material for tweaking.

Saveur recommends to serve the salad with grilled sausages or roasted lamb. I have tried with neither. My way to devour the thing in question is to envelop it in a tortilla wrap thinly smeared with hummus in the middle. Anthony observes that that makes the salad a perfect work lunch: no need to tote a Tupperware® container -- a tortilla wrap keeps the lentils orderly in place.

1 cup green lentils (e.g. de Puy), picked over and rinsed

3-4 Tbsp extra-virgin olive oil

6 garlic cloves, minced

1 1/2 Tbsp fresh lemon juice

1/2 tsp ground cumin

salt and freshly ground pepper, to taste

a generous handful of fresh flat-leaf parsley, chopped

1. In a medium pot, bring lentils and 3 cups water to a boil. (Choose lentils that hold their shape after cooking, the intact look of the lentils in the salad is no secondary fact to the appeal of the dish). Lower the heat and simmer until the lentils are tender, but not mushy, about 20-25 mins. Drain and set aside.

2. In a small skillet, heat 2 Tbsp olive oil. Throw in the garlic and sauté until fragrant, 2-3 mins. Do not let the garlic brown. (The original recipe has you do that for 7-8 mins. Isn’t it a bit too much? Of what use is the garlic teetering on the edge of a burn?) Remove from heat and whisk in the lemon juice, the cumin and the remaining 1 Tbsp olive oil. Pour over the lentils.

3. Add the parsley and season with salt and pepper to taste. Sprinkle with more olive oil and lemon juice before serving, if needed.

21 March 2011

So far

I noticed as a child that when the trees would still be clad in leaves in mid November, there would always be days when the ferocious wind would rise and ramble on and on, until the trees are denuded and the rugged leaves lie, defeated, on the ground. Nature does shake itself up to cleanse, rejuvenate and re-build itself. I tried to make sense of nature forces, minor or grand, like that.
But as a grown-up, accepting that nature can be so hurting requires more mental and emotional work on my part.


I’ve been pondering hard what I should say. Or what I should not. It has been acknowledged by many that it seems weird to write about food in the wake of the monstrosity that’s holding a grip over Japan these weeks.

Yet, I think one of the main reasons many of us choose to write about food is that we want to share. To share of something good, of something memorable, of something uniting, of something positive. All that is food to me. And I can’t think of any reason why one should stop writing about all that, especially now.


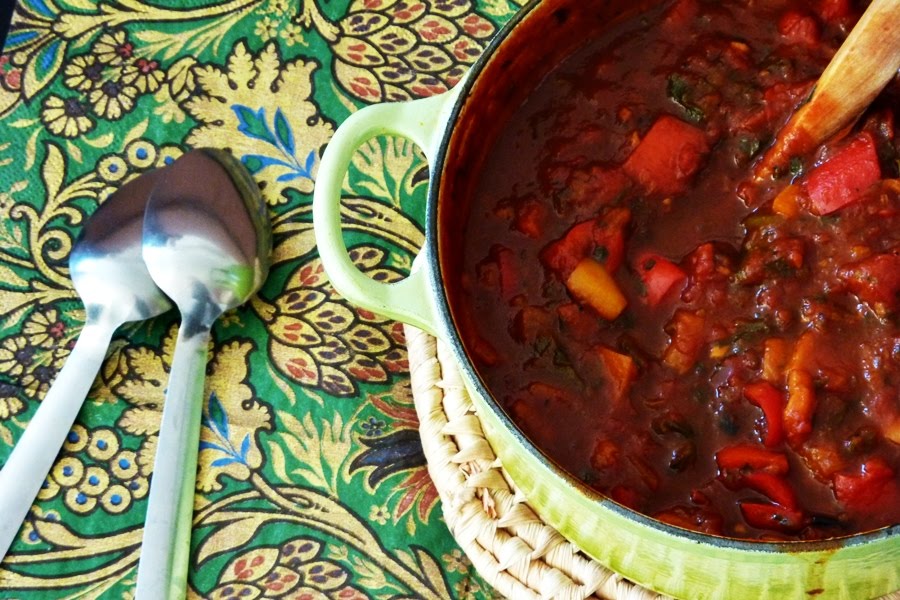
Peperonata, a thick delicious stew of sweet peppers and tomatoes. It is not going to save the world from its tragedies. No, don’t count on that. It will not help a human to stop the Earth plates from moving and colliding, or turn the beastly tsunami waves into harmless ripples, or stop the nuclear reactions at a moment’s notice. Those things are out of peperonata’s reach.

But it can do something for mankind nonetheless. It will cook itself into a sweet and sour bell- peppery-tomato-ey tasty sludge to make one’s mind get away from the misery and sadness and unanswerable questions, be that only for a short moment, and marvel at the priceless simplest things and be grateful for being able to continue to experience them alone and with the loved ones.

Take five sweet peppers: two red, as many yellow, and one green, for color. Deseed and dice them roughly. Chop up one onion, do the same with a few garlic cloves. Sauté the two in a large pot until fragrant, and then send the peppers together with some canned chopped tomatoes to join the gathering. Show the way to the pot to fresh parsley and basil. It goes without saying, salt and pepper should participate too. A few drops of Tabasco would make the whole gathering even more lively. Let the heat do its mingling job for about two hours.


I learned the recipe from Anthony. Upon request and by phone, Anthony’s mother provides him with the recipes he remembers to have enjoyed in the years passed. So far there are three of them, including the one for peperonata, all kept in a thin salad-green fabric-bound notebook. Regardless of the fact that Anthony’s mother hails from the Veneto region in Italy, there is not enough evidence to claim that peperonata is Veneto’s native. I guess it’s safe to say there are as many versions of it in Italy as there are those to cook it. So I’m going to skip any speculations about the original way to make the stuff and will only draw on one Italian mother’s knowledge, of which I am an indirect receiver.

Peperonata
Adapted from Anthony’s mother, Eugenia

The key to a deep flavor here is to let all the ingredients, including fresh herbs, simmer together for up to two hours. This peperonata should be thick, so you don’t want to add any more liquid: there will already be enough of it from the vegetables. Although technically it’s a stew, in this unrepentant household we dubbed it a (pasta) sauce. (Nigel Slater did the same, among much else.)

About serving: Anthony says that in her childhood his mother was used to have it with polenta or sausage (!), the Northern Italian style. We like it with penne or rigatoni. But independent, non-opinionated eaters can devour it with rice, potatoes, or, yes, pretty much on its own with a chunk, or two, of bread.

A few more bits: as stews go, peperonata tastes even better the next day, after all the flavors schmoozed and mingled. I know, I know, sweet peppers are not in season yet. Patch solution: organic “green-housed” ones, perhaps?

3 Tbsp olive oil
1 large white onion, roughly chopped
2 cloves garlic, roughly chopped
5 sweet ripe peppers, halved, seeded and diced
2*400 g (15 oz) canned peeled tomatoes, including juices
1/2 -2/3 cup fresh chopped parsley, finely chopped
6 fresh basil leaves, finely chopped
salt/pepper
a few generous drops of Tabasco, or to taste

1. In a large heavy saucepan, warm up the olive oil over medium heat. Dump in the onion and sauté until lightly brown, 5-7 mins. Here it may be argued that the onion should only take on a touch of golden, no browning. But doesn’t the browned onion mean more flavor? So no worries, brown the stuff.

2. Add the garlic and cook for another minute.

3. Throw in the peppers, follow with the tomatoes and the fresh herbs.

4. Bring to a simmer and bring the heat down to very low. Add salt, freshly ground pepper and Tabasco to taste. Cover halfway with a lid and cook for the next two hours. Make sure to stir every now and then to avoid scorching. Taste and adjust the seasoning if needed. Remember that salt extracts the vegetables’ aromas, so don’t be stingy with it (but don’t go rampant either).

Note: the quantity is enough for about 300 gr (10 oz) dried penne, which amounts to 4 moderate servings.


25 February 2011

Cooking the beef nicely

February, wait up! Wait up, I say!

Gentle Reader, my confusion knows no end. I gave up understanding why those 24 hours that we all know equal a day go rampant and unruly when all you need from them is that they walk beside you, steps measured and in accord with yours. But no. They are like a pack of hunting dogs, unstoppable in their pursuit of whatever. Oh lay, what would you do with this rushing time, so eager to leave you behind, so capable to speed up on and on. I've been thinking a lot about it lately. That and about meat – steak, in particular.


Let me explain.

I'm not a vegetarian. I like a beautifully cooked piece of meat (sustainably and humanely grown, of course) as much as a plate of chickpeas. Yet I scarcely got to eat meat. Mainly because I didn't know how to cook it without turning it into an unswallow-able substance -- sometimes charred, always dried-out. For a while I used to be sure that the cooking of meat is a men's domain. My logic rested on the bones of a fact that generally the man's usual food of choice is a sizzling steak and that, by extension, meant to me that men understand meat better than we women do. Cooking steak is a gender thing, I assumed. Until I made friends with men who, despite their taste devotion to meat, didn't exactly excel at making an edible steak themselves. That unscientific observation of mine triggered a desire in me to find out what it is to be held accountable for a botched steak.

I consider it my fortune to have a chef among Anthony’s and mine friends. It’s a double fortune that this chef friend of ours, Jan-Willem Teunis, is a member of the Irish Beef Club. Meat is no doubt taken seriously in this establishment and so in an effort to stop my steak jinx, I asked Jan-Willem to please teach me the basics of cooking the beef nicely.

Even before attempting, I knew that the path to a mean steak is through the right temperature. Yes, I knew that already. What I wasn’t aware of was the way the heat should get through the meat. This has to happen slowly – and in short intervals.

Here is how to achieve it. The first thing to do is pre-heat the oven to 220 C. Second, bring the piece of sirloin, filet mignon, what have you to room temperature. This step is important, for if the meat is put in the heated pan too cold or frozen, the temperature of the pan will drop. When your beef cut of choice is good to go, the next step will be to “seal” the future steak (to give it color) by cooking it in a thoroughly pre-heated frying pan to which a few generous glugs of olive oil were added. When the oil turns transparent and thin, you add the meat and let it frizzle on each side, broad and narrow, until it takes on deep golden brown hue. As a finishing touch at this stage, throw in a knob of butter, for flavor. While you pour the liquid (use a soup spoon) that accumulates in the pan over the meat, you could take a quick moment to reflect upon the loud sizzling relationship that you see between heat, fat and muscle. The whole step takes no longer than about three or four minutes. At this moment, the steak is rare.

Next, place the meat in a vessel fit for the oven – a casserole dish, or a stainless steel tray, or a small cast-iron pan -- and leave it to rest for a couple of minutes in a warm place (if you used cast-iron pan for the searing, don’t use the same one now: at this point you don’t want the meat to continue cooking, which it will from the heat of the pan). This is done to let the meat relax first before the successive bouts of heat.

Finally, you send the steak in the oven. Two minutes in, four minutes out. Two minutes in, four minutes out. Two minutes in, four minutes out. Two minutes in, four minutes out. Alternating the cooking and resting times ensures that the heat won’t get in the beef faster than needed and that the meat stays soft and juicy throughout. Feel your steak now: if it springs back the way the flesh between your thumb and index finger does when poked, the steak is medium rare. If you want it medium or well-done, continue cooking it in said intervals up to seven or eight times. My last steak was done medium-well already after the fifth time in the oven. Be watchful and careful here, is all I’m saying. Poke the meat as you go, it shouldn’t feel shoe-sole-like to the touch. But of course you know that. Some salt and pepper and a small pour of fragrant olive oil over the finished steak – and you are in business now.


One of the things I find admirable about food is that once you’ve had a meal you thoroughly enjoyed, with dear friends or all by yourself, it is able to envelop and seal the fleeting moment into a cherished memory, a memory of laughs shared, of bites relished, of knowledge passed on.

14 January 2011

I took the bait


It is my impression that if one learns where I come from (Russia), vodka is what most likely will spring to the inquirer’s mind. One might even take it further as to try to ask me if my mother fed me vodka as a child. Just so if you are questioning the latter, let me tell you that a couple of years ago, at the start of my studies in Amsterdam, a Dutch lecturer of English wondered out loud in class if Russian parents tend to nourish their babies with vodka. How is that for tact?

As you might have guessed, this was what’d been gnawing at me profusely. It is unfortunate, I thought, that the prejudices and stereotypes overrule the real state of affairs regarding the drinking habits of Russians. Please, don’t get me wrong. I’m not saying that the abusive consumption of vodka by Russians is a thing unheard of in and out of the country. What I’m driving at is that there are millions of Russians who do not substitute their daily intake of water with vodka, or other alcoholic beverages if at that.

The cultural shame prompted by the foul stereotypes did very little for me to think of vodka as a fine drink. In my eyes, vodka was a villain and I wanted to avoid it, point. Holy smoke, I did pretty well on that front. Take this: my first contact with vodka occurred just a year ago in a cocktail bar here in Amsterdam where Anthony and I, overtaken by curiosity to try interesting items on the menu, laid our lips on vanilla vodka, a drink mistakenly imagined (emphasis on mistakenly) by us as a sweet concoction of something syrupy and vanilla-y fortified by vodka. Turned out it’s wise to ask your bartender about what constitutes your cocktail as it is generally clever to shoot a few questions over the bar before ordering. What we learnt empirically was that vanilla vodka, at least in the version we tried, is as savory as savory can be: plain vodka mixed with a touch of pure vanilla extract. No sugar, nothing sweet. Woof!

But shame is on me for digressing…

To be able to tread on the treacherous ice of stereotypes, I figured I should equip myself with some protective knowledge to stand my ground when confronting an occasional vodka remark. I was glad to learn that my country of origin does not seem to be the leader in the field of producing the booze in question. Check this out: the production of vodka -- wheat, rye, potato, rice, cane sugar, grape, younameit type -- fastened the globe all around, from Canada to Vietnam. You get my drift? Theoretically not only Russians are prone to the excessive vodka intake, is my point.

I’m sorry – does all that sound somewhat fired up? I guess I must learn that ultimately it’s up to me to decide how to deal with the stereotypes. I can’t force one to change their opinion, that’s no news to me. What I can do is loosen up my attitude. I either can flip the lid trying to verbalize my objections, or alternatively I can lean back on my couch, my feet on an ottoman, and enjoy the fact that vodka exists in the first place. You see, without vodka there would be no Moscow Mule. And without Moscow Mule…I don’t know what we all would do without it.

Ladies and gentlemen, please meet Moscow Mule: an elegant cocktail of vodka, fresh lime juice, ginger beer, and ice. My endless thanks for the original creation go to a trio of Americans: John G. Martin, John A. Morgan, and Rudolf Kunett, each of whom was involved in spirits production or distribution. The three friends gathered up one day in New York’s Chatham hotel in 1941 and, fuelled up by a few drinks and hors d'oeuvre, got overtaken by an adventurous genius. Some ginger beer, some vodka, some fresh lime juice, and voila, served on the rocks, the first Moscow mule made its appearance. The first part of the cocktail’s name – Moscow – is a wink towards the land of vodka. But there are no mules in Moscow, as if you had to ask. It’s named so because of its inebriating properties: it kicks like a mule, as it were.

The photo above is a home-made Moscow Mule. Photography of thatkind is what I make when my vision gets thoroughly fogged by an immodest amount of alcohol and my hands wobbly from the excitement to rush out on the balcony to watch the loud, noisy, mind-splitting, sky-unzipping, glorious New Year’s fireworks.

Speaking of New Year’s, Anthony and I, having had a blast over the Christmas dinners at friends’, decided to spend the New Year’s in the setting of our home – I don’t recall my mentioning that past November we again moved houses; it’s a high-rise and we are on the eighth floor with nothing above our roof but the endless sky -- where we enjoyed the society of a bottle of vodka that yielded innumerous, for the two of us, Moscow Mules. Delicious!

My very special thank you goes to a mixologist from a local speakeasy-style cocktail bar, Door 74. His name is Timo and in my eyes he is a true alchemic: he turns ordinary spirits into cocktails which are nothing less than gold. One day early December last year, Anthony and I got seated at the bar in Door 74 ready to watch Timo in action, which is – I’m sure – akin to observing a three Michelin-star chef at work. A new season cocktail menu had just gone into effect. There were many drinks I tried and liked. But none of them I liked as much as Moscow Mule. I didn’t have any knowledge about the cocktail before, but the ingredients (other than vodka) listed in the description and the name piqued my curiosity. I took the bait.

One Moscow Mule for me, please!

Dressed in a sleek black three-piece suit, with a tie-clip in the shape of a sword, Timo nodded his approval and took a copper mug from the fridge. Cubes of ice twice the size of a standard game die made their way into the vessel. The juice of half a lime was squeezed into the mug, into which Timo poured some vodka and finally ginger beer just enough to top it all up. A few stirs later and I was given a drink – zestful, zingy, refreshing, spicy stuff -- that would change my relationship with vodka for good.

Next time I’m asked what my parents gave me as a child, I’d non-hesitantly say, “Oh I wish they’d have given me Moscow Mules!”

Moscow Mule
Inspired by Timo Janse

Despite the simplicity of this drink, there are a few things that can detour you from a well-balanced result. First: ice. It’s important to use it, a lot and preferably in big cubes (big cubes melt slower). Our first home-made Moscow Mules were without any, which made them taste “rough”, as if the individual components of the cocktail didn’t want to agree to play in a team, each trying to be more distinctive than the other. The ice, as impossible at it sounds, brings all of them together.

Second: ginger beer. It should be pronouncedly sweet to even out the non-sweet-at-all lime and vodka, and spicy to perk things up. Old Jamaica ginger beer is the name of the game.

Third: glass. Originally Moscow mule was to be served in copper mugs; one of the inventors of the beverage owned a copperware business. But these babies are quite costly. So if you don’t own one, it’s not the end of the world. Use a tall glass instead. Just be aware you might want to adjust the measurements depending on the size of your glass. Basically, you mix one part vodka with one part fresh lime juice. The amounts I give below are fit for a 300-ml (10-oz) tall glass.

And finally, it’s imperative that vodka you use for this concoction is on the smooth end of vodka spectrum. If you can, use a high-end vodka brand with a smooth taste, such as Ketel One or Grey Goose.

Serves 1
ice cubes
20 ml (0.75 fl. oz) vodka, such as Ketel One
juice of half a lime
ginger beer, such as Old Jamaica


Fill a tall glass with ice. Add vodka. Take a half of lime and if you don’t have a professional squeezing tool that bartenders use, take a strong pair of salad tongs and squeeze the lime to its fullest. Chuck the squeezed lime into the glass. Top it off with ginger beer; stir well. Enjoy responsibly!